
Adjusting the settings
Highlight and background color
Quality
Text size
Home on select
Flip left to right
Cadaver colors
Outlines only
Display walls
Altering shadows
Show structure title
Rollover labels
High resolution stills
Anti-aliasing
Saving with transparency
Orientation cube
URL formatted sharing
3D stereo anaglyph
HOME
Start page
Highlight and background color
At the top of the settings panel are five options to change the highlight and background color of the interface which can be changed at any time. If in multiple-select mode, the different highlight colors are a useful way to color code groups of structures.
Highlight colors
Background colors
Click on the links opposite for video demonstrations of this functionality:
Quality
Lower specification machines may have difficulty displaying large numbers of structures in high resolution. If you find the model becomes slow to move, or have difficulty loading the model, try reducing the quality.
Click on the link below for a video demonstration of this functionality:

Text size
Use these controls to increase or decrease the size of the text. If the text size in the text panel, and structure title at the top of the view panel are too small, try increasing the size of the text here.
Click on the link below for a video demonstration of this functionality:
Home on select
Home on select is a function that affects how the contents and search results are displayed. If a structure is selected from one of these panels and home-on-select is on, the camera will move to focus in on the new structure. Turn this function off if you do not wish the camera to be affected when new structures are added.
Click on the link below for a video demonstration of this functionality:
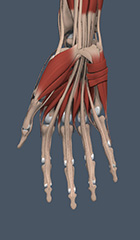
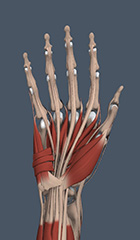
Flipping the 3D model
Flip left to right is particularly useful in the limb products, as it allows you to switch between right and left. You also have the option of
'Flip top to bottom' in 3D Real-time Forearm, Wrist and Hand
Click on the link below for a video demonstration of this functionality:
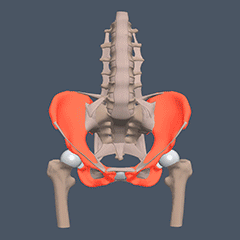
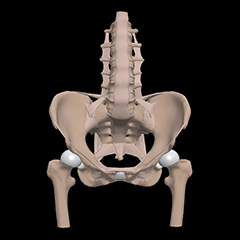
Cadaver colors
By default, the 3D model is brightly colored to match the style of a textbook illustration. If you would like the model to look more realistic, use the cadaver colors function to apply textures that are more aligned to those seen in a real dissection.


Click on the link below for a video demonstration of this functionality:
Outlines only
Turn on the outlines only function to turn all the structures in the model white, leaving just thin, black outlines visible. This mode is designed for creating coloring book-style images.

Click on the link below for a video demonstration of this functionality:
Display walls
Clicking on display walls will display a three-dimensional grid behind the 3D model. This is an extra guide to help you orientate the model.
Click on the link below for a video demonstration of this functionality:

Altering shadows
The soft and hard shadow controls alter the amount of shading shown on the model. They are best used if your device has a fast graphics card.
This feature is not available on iPad or Android

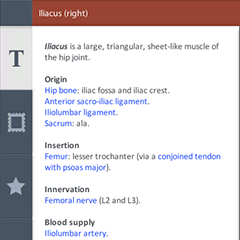
Show structure title
By default, when a structure is highlighted, its title appears in the top toolbar. This function can be disabled to allow self-testing by clicking here.
Show structure title ON
Show structure title OFF


Rollover labels
By default, rollover labels appear if the cursor is moved over the 3D model. The labels display the title of each structure, and can be disabled to allow self-testing by clicking here.

Click on the link below for a video demonstration of this functionality:
This feature is not available on iPad or Android
High resolution stills
This option enables you to save high resolution stills of the model, which is useful if you would like to print the still at the highest quality. Stills saved at this setting will have up to three times the amount of pixels as displayed on-screen (depending on the specification of your computer). Note that Labels and Drawings cannot be saved in a high resolution still.
When turned off, stills are saved with the same amount of pixels as currently displayed in your browser window.
This feature is not available on iPad
or Android
Anti-aliasing
Anti-aliasing is a method of smoothing edges. With this function turned on, the edges of the model look smoother; with it turned off, edges can look more “stepped”. It’s a good idea to keep anti-aliasing on unless you are saving high resolution stills, in which case it is best to turn it off as some graphics cards don’t support anti-aliasing with high resolution stills.
This feature is not available on iPad
or Android
Saving images with transparency
By default, images are saved with the same color background that is displayed in the program. Select Images saved with transparency to remove the background color, and save the image as a png with a transparent background.
Note that on iPad and Android the equivalent setting enables you to save the image with a white, rather than transparent, background.
Orientation cube
Show or hide the orientation cube that appears in the top left corner of the view.
Click on the link below for a video demonstration of this functionality:

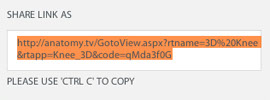
URL formatted sharing
When you share a link for an image, an URL will be generated. This is helpful when you aren’t linking to lots of model views. If, however, you have multiple model views to share, you can turn off the URL function so when you share a link it will give you a code instead. This code can be copied and pasted into the favorites panel, allowing you to import lots of views at once, without having to wait for the model to load each time.
This feature is not available on iPad
or Android
URL formatted link
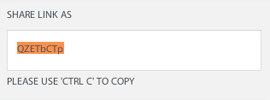
Code link
3D stereo anaglyph
The 3D stereo anaglyph mode can be used in conjunction with 3D glasses, to view the model with stereoscopic effect. You can adjust the extent of the stereo effect with the slider below.

Click on the link below for a video demonstration of this functionality:
This feature is not available on iPad or Android